User Help System
/*]]>*/
Search for Filled Orders
Use the Fills card to search for orders that have been filled (one firm at a time) in the current market day.
The Fills card includes a variety of search parameters and customizable columns.
Note: To save your query for future use--see Save Query.
- Search for filled orders and modify qualifying parameters
- Select +Add Card and select Fills.
- Enter data in the desired fields.
- Firm: Select from the drop-down menu.
- Session ID: Select from the drop-down menu.
- Executor: Enter the short code for the person or algo identified in iLink 3 FIX tag 5290 (i.e. SenderSubID).
- Account: Enter the account number.
- Liquidity Provider: Select from the drop-down menu (if an order was submitted for market making obligation or not).
- Contract: Enter the product code. User the Product Code Lookup link as needed.
- Long Name: Enter the long name of the instrument.
- CUSIP: Enter the CUSIP identifer.
- ISIN: Enter the International Security Identifier Number.
- Short Sale Type (for BrokerTec markets only): Select from the drop-down menu.
- Counterparty (for EBS markets only): Enter the name of counterparty.

- Select Search to display the results on the screen or select Report to File to immediately download to a CSV file.
- Maximize the card to view more columns.

- Use the various features to view the list:
- Refresh: As orders are filled during the market period, the list may change quickly. Refresh to get an updated list.
- Column Heading: Select any column heading to sort in ascending or descending order.
- Number of Rows: Select from the drop down menu to display a number of rows.
- Page: Select the specific page or use Next or Previous if the search result is comprised of multiple pages.
- Search Box: to further filter the list, enter filtering text in the box. This can be text/data from any column.

Note: Use Wild Card Matching for text fields.
Note: Use Maximize  to use full width of the window. Scroll to the right or left to view more columns if necessary. See definitions of the columns and fields: Search Criteria, Order Status, Order Type, Time In Force.
Note: After applying search filters, select Reset Search Criteria to reset all search field entries to the default settings.
Note: Use Report to File to save resulting list to a CSV file. For large files, this may take a few minutes. The CSV file contains more columns than appear from a search result.
- Use Advance Search
- Select Advanced Search to display/hide additional search fields.
- Enter data in the desired fields.
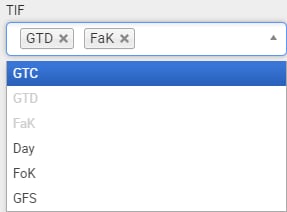
- TIF (Time in Force): Use the drop-down arrow to select multiple choices. Select the x to delete previously selected choices.

- Execution Types: Use the drop-down arrow to select multiple choices. Select the x to delete previously selected choices.

Outrights - Returns any fills on outrights.
Legs - Returns any fills on legs of a spread.
Spread Summary - Returns a summary of fills for a top level spread summary.
- Client Order ID: Enter desired data.
- Trading Day: Select from the drop-down menu. This defaults to the current day, but you may select from the past 7 days. Note that future dates are shown; this is used when trading after 5pm. These are logged with a Trading Date for the next day or if the next day is a holiday, the day after.

- Price Format: Select from the drop-down menu--Decimal, Fractional
- Fill Price: Enter desired price.
- Order Price: Enter desired price.
- Include Mass Quote Fill: Check or uncheck the box as desired.
- TIF (Time in Force): Use the drop-down arrow to select multiple choices. Select the x to delete previously selected choices.
- Select Search. Hint: use the Maximize
 to take advantage of the full width of the window.
 - Use View and Edit the query
- Select Show my filters. The current query filters appears.

- Select Edit query.
- Modify content of any of the fields.
- Select Search.
Customize Fills Columns
- Customize columns of fills data resulting from a search query
- Select the Settings icon; then select/de-select the column names (scroll to display additional column names as needed):

- Select the Settings icon again to return to the previous view.
- Select Search.Only the checkmarked columns appear.
View Order Detail
- Select any row's Client Order ID from the resulting Order Search to view its order detail.
- An Order Detail card appears; maximize card to see all columns.

- Close the Order Detail card.


